Nintendo DS Lite : Repairing a FlashMe brick
This tutorial will explain you how to repair a DS Lite bricked during FlashMe.It will not describe the FlashMe process but the way to start FlashMe again.
First, you can try the "soft" method, but it won't work unless you have the main part of FlashMe installed.
Let FlashMe on your device (SuperCard, G6...), remove EVERYTHING from the DS Slot (PassMe, gamecard...) and start the DS pressing A+B+Start+Select.
It will boot on GBA slot (recovery mode) and you should be able to start FlashMe and install it.
Now, let's try the "hard way" if it didn't work.
What you need :
- Two DS Lite
- A tri-wing screwdriver (to open the DS)

- A way to start the FlashMe setup on a DS Lite (PassMe 2, NoPass...)
I. Open the two DS
- Remove the battery cover
- Remove the battery
- Unscrew every tri-wing screws with the screwdriver

II. Change BIOS
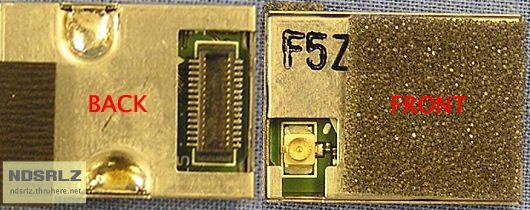
When it's done, find the bios ( = firmware) chip on the motherboards using the picture below.

You will have to remove the chip from its socket on the bricked DS Lite, and put the one from the working DS Lite instead.
III. Setup FlashMe
The broken DS Lite will now start.
Boot up your device (SuperCard...). Now switch to the broken bios chip and start up FlashMe.
Setup FlashMe correctly and put back the other firmware chip into his socket (on the 2nd DS).
IV. Finished
You now have two DS Lite working.Thanks to scdev.org members for informations.
