Nintendo DS : FlashMe setup
This tutorial explains you how to put FlashMe on a Nintendo DS (old ones). Another tutorial might come explaining how to put FlashMe on DS Lite.What you need
- A small screw driver
- A piece of foil paper
- Nintendo DS / DS Lite (of course)
- PassCard device (PassMe 1/2, PassCard 3, EZ-Flash Pass3, or WiFiMe for fat DSes) in order to boot code from the GBA slot.
- A flashcard to put FlashMe on (SuperCard ...)
- FlashMe ".nds" file. (download it here)

- First, you will have to copy the FlashMe file on your card. You can get it in the downloads page.

- On the back of the DS, there is a screw holding the battery cover. You need to unscrew it.

- You will find three holes, you need to remove the small sticker on the top one.

Here is the SL1 on the motherboard :

- Prepare the screwdriver by rolling up foil paper around the point.
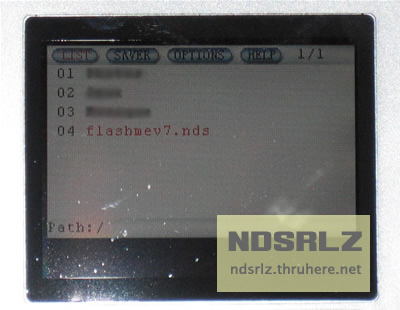
- Now start the DS. Choose the FlashMe program (here is an example using SuperCard)
- You will have to hit X B X B to continue and then you MUST keep your DS on until it's finished (plug the adapter for security).
- Put the screwdriver with foil paper to short SL1. You have to touch the two sides of the gap (check the yellow bar on the previous picture).

- If you do it well, the percentage should increase. If it doesn't work, try to move the screwdriver in the hole.
- When the bottom screen shows 100%, you have finished. You can switch off the DS and put the battery cover back.

